Showing posts with label bookcase. Show all posts

Monday, June 27, 2016

Michaels had CRATES on Sale!

 I went into Michaels for some paint on the fish rocks I'm painting and found CRATES ON SALE!

I'd seen these used on Pinterest for shelving so I thought the sale was the universe was giving me a sign.

I bought 4 crates, but then had to decide on stain or paint...hmmmm.

After taking them home and giving them a good sanding  the wood was still kind of rough so I opted for paint over stain. I thought spray paint might help contain any splinters. These were going in my Art studio so I went with some happy colors.


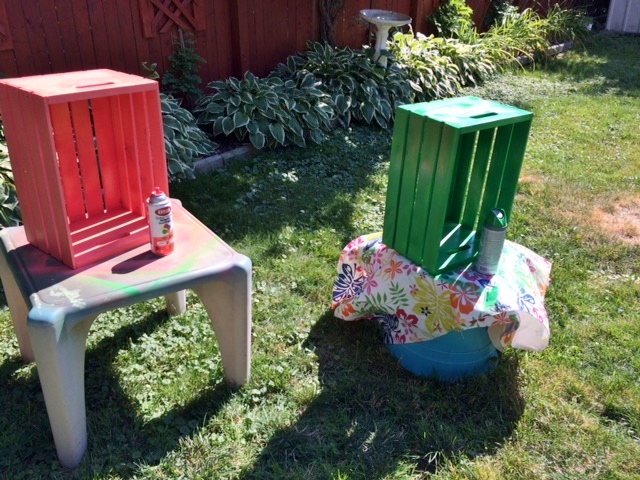
I spray painted them 4 different colors. Each took almost a can to get good coverage, about two-three coats. The green needed the most.


Then I stacked and re-stacked them until I decided which color should go where. (Hadn't really thought of that when I picked the colors)

My hubby used his electric drill and screwed the crates together.

Done! This little shelf unit was less than $50.
I had most of the paint and the crates were $9.99.  

Time spent? One weekend; painted one day, put together the next. 

Happy crafting!


Sunday, September 6, 2015

Bookcase Makeover

 I have this old bookcase, once painted white to match my daughter's room. She's grown up and moved out and I had to do something with this well worn, yet sturdy piece.

First, I pried off the back and sanded down many layers of paint. Then, two coats of semi-gloss paint in a bright color on the frame (in my favorite color.)


While that was drying I got out some craft paper and Mod Podge. I've never used this stuff before so it was a challenge. I laid out my paper and trimmed the edges to fit. I spread some Mod Podge with a fine paint brush and carefully laid the paper down and pressed out the air bubbles. Once it was in place and looked good, I moved on to the next sheet.

After all the paper was Mod Podged down, I put two coats of Mod Podge over the whole thing.

Confession; After getting them all down with the Mod Podge the first time, there was a major air bubble on the middle of one sheet. I made the big mistake of trying to smudge it out when it wasn't quite dry yet and ripped the paper. ArrGGGhhh! I had to peal that piece off as best as I could, sand a bit, wipe it down and then put on another sheet of craft paper. Good thing I bought extra!

Once finished I let it dry over night. If this had been a table or something that would have gotten a lot of hands on wear and tear, I would have let it dry for 4 days and then put on a more protective finish.  Back of a bookcase? I nailed it back together the next day. And here you have it!

 If I had it to do over again I might have YouTubed how to do Mod Podge and maybe avoided my air-bubble mistake.

I'm using this for a storage shelf in my art room and I'm pretty happy how it came out.

Now I've got my eye on that worn little end table in the living room....

Happy painting!